
Tag Tutorial created by ®ivice2007
Last Updated: May 2017
Level: Advanced
Tools: PSP XI ,Various Plugins
All materials included *
Tested in other versions of PSP
including Corel PSPX7
..:: TERMS OF USE :
The materials I use belong to the artist who created,
Please don’t change the name or use them for your own tutorials.
..:: MATERIALS ZIP
Donwload here♥
- Tubes- jet-woman08-februari-2008
- Tube- mds8000_Water
- Tubes ivice – global_lamp, Halo, Starsback, text.
- Eye Candy Presets by ivice
- Pattern – achter_pattern
- Gradient- ivice_gradient_bluebox
- Selection- ivice_gradient_bluebox
*Plugins: Toadies , Penta, Ulimited2, EyeCandy5/Impact
Download HERE
*Install Pattern,Gradient and Selection in your PSP folders.
* We will be exporting the Eye Candy Presets from the application later on.
..:: STEPS
1..:: Open a new image 685 x 470
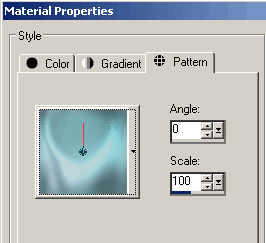
2..:: Set the foreground color to the pattern “achter-blue”
3..:: FLOOD FILL the image with it
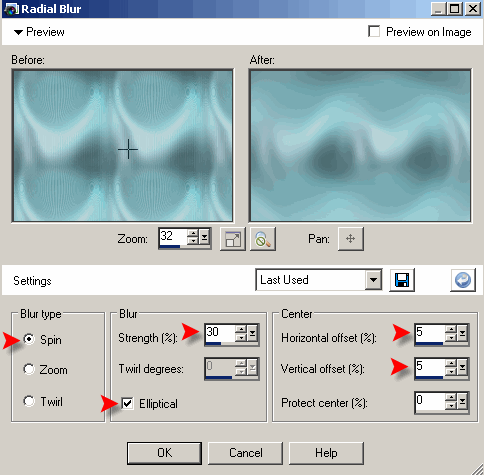
MENU ADJUST–> BLUR–> RADIAL BLUR
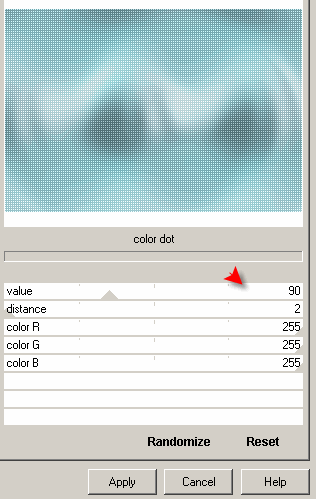
4..:: MENU EFFECTS–> PLUGINS–> PENTA.COM–>COLOR DOT
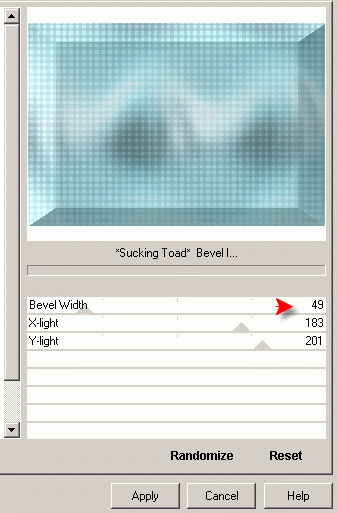
5..:: MENU EFFECTS–> PLUGINS–> TOADIES SUCKING TOAD BEVEL 1
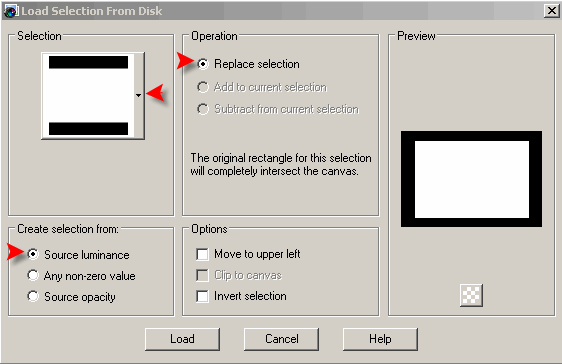
6..:: MENU SELECTIONS–> LOAD/SAVE SELECTION –>
LOAD SELECTION FROM DISK: “ivice-001 bluebox”
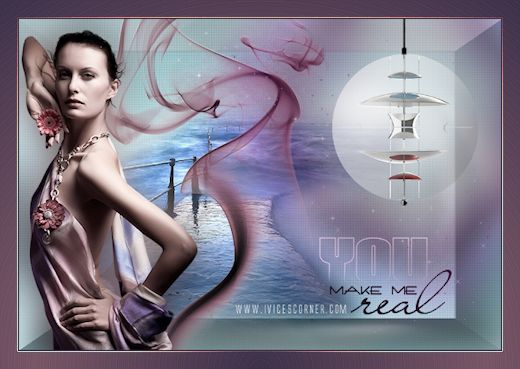
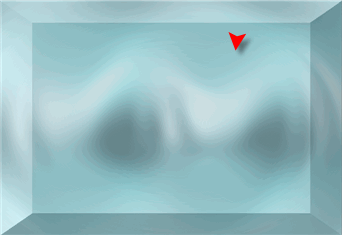
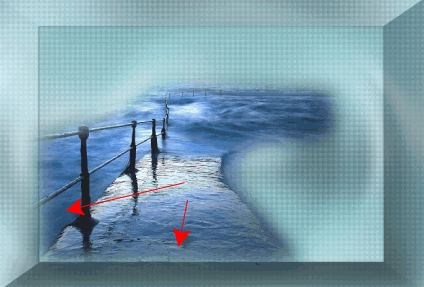
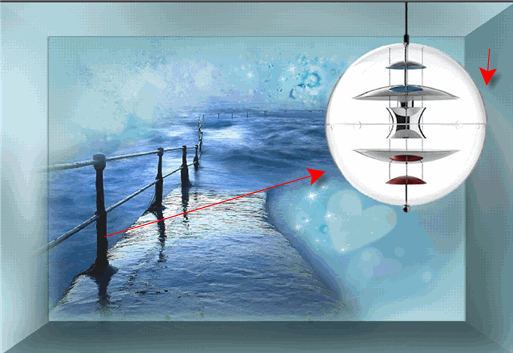
And this is what we have until now:
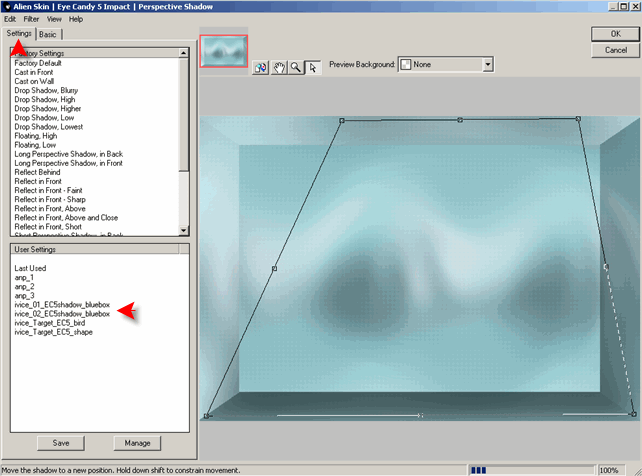
7..:: With the Selection running:
MENU EFFECTS—> PLUGINS–>
EYECANDY5/IMPACT -PERSPECTIVE SHADOW
Click on MANAGE Select Import and look for the preset
included in the zip “ivice-01 EC5shadow-bluebox”
(You will now see it in your preset list)
CLICK OK to apply.
8..: With Selection still running
MENU EFFECTS–> 3D EFFECTS–>
DROP SHADOW color #365358
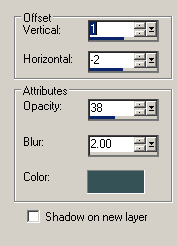
9..: Invert selection, Repeat the same shadow
MENU SELECTIONS—>SELECT NONE
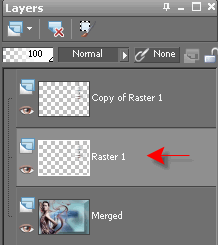
10..: Copy and paste the tube “mds-8000 water” as a new layer
and put it into position a bit to the left
11..: Copy and paste the tube
“JET woman08-februari2008” as a new layer
Resize to 68% (all layers not checked)
12..: MENU IMAGE –> MIRROR HORIZONTAL
and position the image into the left of your tag.
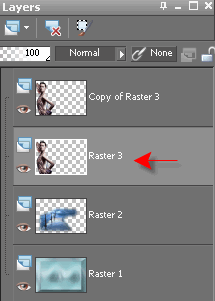
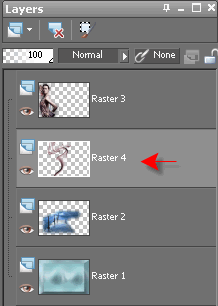
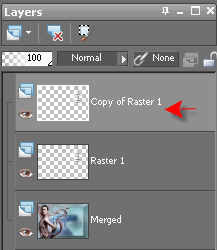
13..: Duplicate this layer and click in the original layer
to active activate it
This is how our layer palette looks until now
 .
.
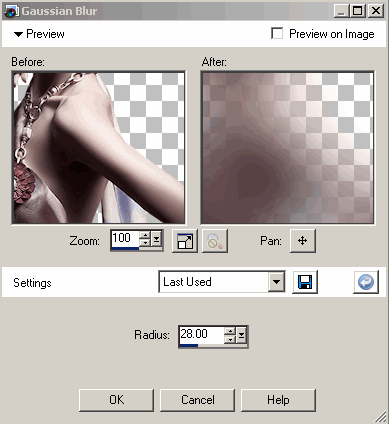
14..: MENU ADJUST–>Adjust, Blur – Gaussian Blur 28
15..: Left Click on the top layer of the Girl tube
and select MERGE DOWN
16..: Copy and paste “ivice-halo” as a new layer,
Position it to the left side of the image.
and drag its layer one level down (under the Girl tube)
17..: Copy and paste “ivice-globelamp light-transparent”
as a new layer and position it to the right of the image
18..: Duplicate this layer and Click in the original to select it
19..: Plugins EyeCandy 5 / Impact – Perspective Shadow
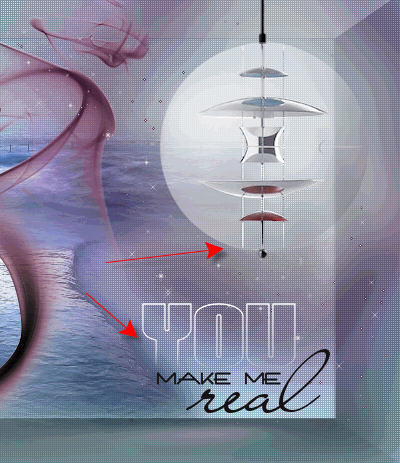
Import and Select the preset “ivice-02 EC5shadow-bluebox “
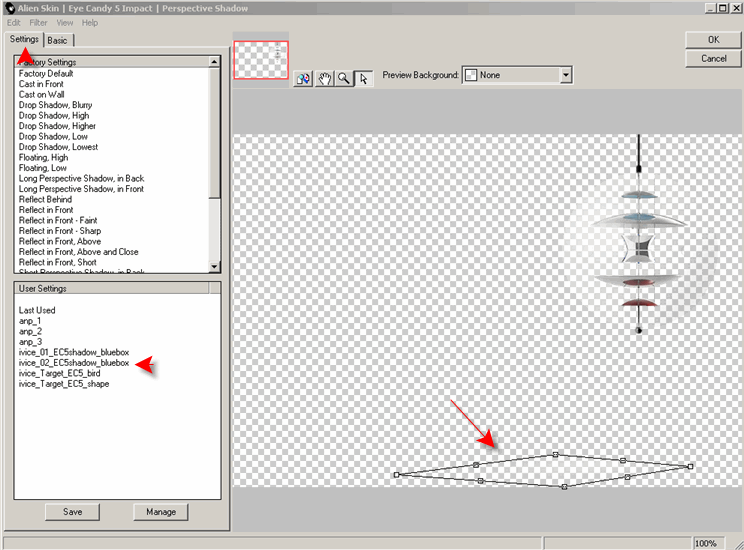
The shadow effects must falls in the floor under the lamp,
You can play with the vector nodes inside Impact Perspective interface
to transform and relocate in any way you wanted.
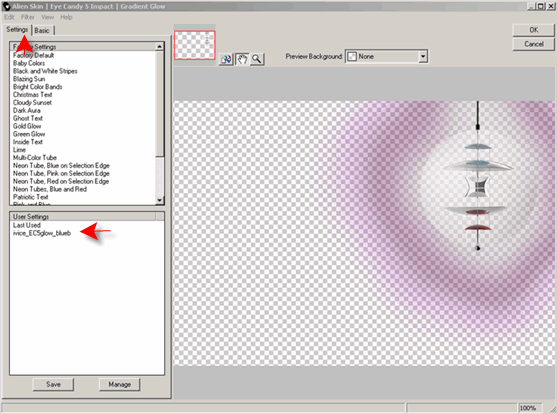
20..: Click on “copy of globe lamp” layer to make it active
21..: Plugin Eye Candy 5 / Impact – Gradient Glow
Import and apply preset “ivice-EC5glow-blueb”
22..: LAYERS–> MERGE DOWN ( to merge both layers with the globe lamp)
23..: Copy and paste “ivice-stars-back” as a new layer
Position it in a way that looks like the stars are around the lamp
and move this layer under the “globelamp merged layer”
24..: Copy and paste “ivice-umakemereal-text” as a new layer
25..: LAYERS–> MERGE ALL LAYERS VISIBLE
26..: You can either leave it as it is or add a border.
..:: ADD BORDER
1..: Set the foreground color to #785 666,
background color on #3D314A
2..: We will add borders in different width and colors like this:
MENU IMAGE–> ADD BORDER- 2 pixels
with Background color #3D314A
MENU IMAGE –> ADD BORDER – 25 pixels
with foreground color #785 666
MENU IMAGE–> ADD BORDER- 2 pixels
with Background color #3D314A
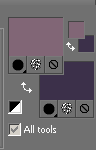
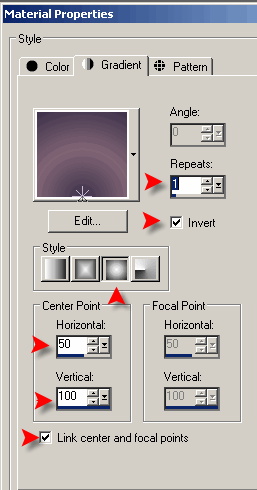
3..: Make foreground gradient with “ivice_gradient_bluebox”
4..: Select with the magic wand the 25 pixelsborder
Add a new Layer and Flood fill this border
with the gradient “ivice_gradient_bluebox”
using this settings
5..:Edge effects – Enhance
Edge effects – Enhance more
5..: SELECT NONE, MERGED VISIBLE and we are done!
If you would like to share your results with me,
You are more than welcome to post them in my
FACEBOOK PAGE
I would so love to see them 
loVE iS tHe WaY !
![]()
 English
 Spanish
 Dutch
Dutch
0 comments
No comments yet