Tag Tutorial created by ®ivice2005
Last Updated: May 2017
Level: Intermediate.
Tools: PSP9 and Animation Shop3.
Targeting: The use of filters.
All materials included *
Tested in PSPX over Windows XP Platform.
Alternatives offered to be also completed
in older versions of PSP Incluiding Corel PSPX7
..:: TERMS OF USE :
The materials I use belong to the artist who created,
Please don’t change the name or use them for your own tutorials.
..:: MATERIALS ZIP
Donwload here♥
- Tube- DeanYeagle_FriendInFaux_Moonstar
- Tube- WinterBarnPTR
- Background- ivice_snowbackground
- Font- GenericUncials’Snowcapped’
- PSP file of Merged Tag- with effect Mezzo Force already apply
has been included for those unable to run the plugin.
..:: PLUGINS
- Plugin VDL-Adrenaline-Snowflakes HERE
- Plugin Mezzo Force Ice HERE
(for user of PSPX, Windows XP Only. See note below *)
****IMPORTANT
Plugin Mezzo Force still works for users of PSP9 and PSPX
running Windows XP, but users with older versions of PSP
and/or running Windows 7, vista,etc. will not be able to run this plugin.
Until I come upon a solution, my MERGED PSP TUBE
with Mezzo force effect already apply can be download HERE
For those who still want to complete the rest of this tutorial.
..:: STEPS
1..:: Create a new image size of your choice
Mine is small 500×365 pixels, white background.
2..:: SELECTIONS–>SELECT ALL
3..:: Open “Background- ivice_snowbackground” in PSP
COPY and PASTE INTO SELECTION
4..:: With the selection still running
LAYER–>ADD NEW RASTER LAYER
5..:: Open Tube “winterbarn_background”
COPY and PASTE INTO SELECTION
6..:: >With the MOVE TOOL let’s place it a bit to the left side of the tag
SELECTIONS–>SELECT NONE
This is what we have until now
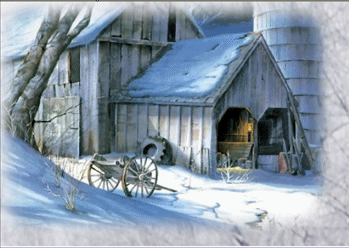
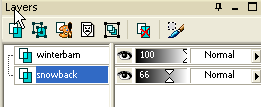
7..::In the layers palette set the OPACITY of layer
“ivice_snowbackground” to 66%
8..::MENU LAYERS–>MERGE ALL FLATTEN
9..::Copy and paste tube “DeanYeagle_friend..” AS NEW LAYER
Resize at 65% using SMARTSIZE resample
10..::With MOVE TOOL put into it’s place
This is what we have until now
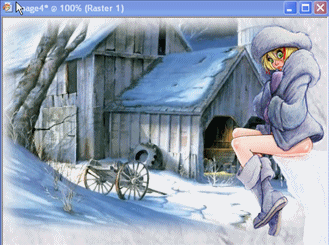
11..::EFFECTS –>DROP SHADOW –>Color #4a647e
with the following settings
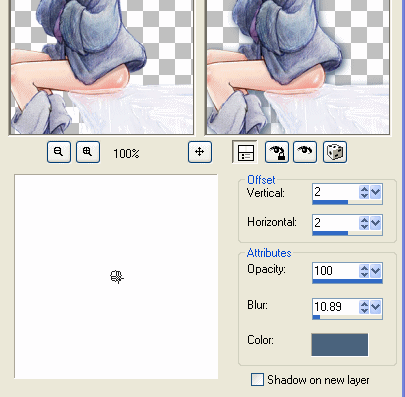
12..::MENU LAYERS–>MERGE VISIBLE
13..::SELECT TEXT TOOL and add our signature
FOREGROUND–> #ffffff
BACKGROUND-> #567390
![]()
14..::LAYERS–>CONVERT VECTOR TO RASTER LAYER
15..::EFFECTS–>3D EFFECTS–>INNER BEVEL
With the following settings
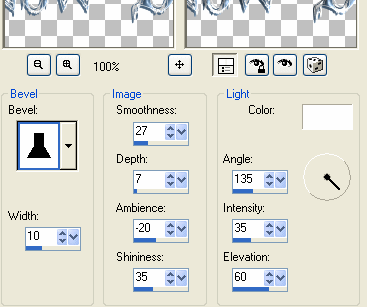
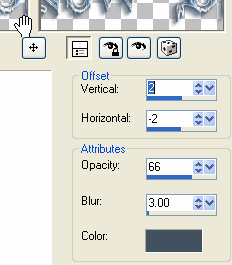
16..::EFFECTS–>DROP SHADOW –>COLOR #4a647e
and using this settings
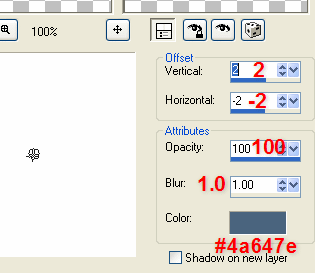
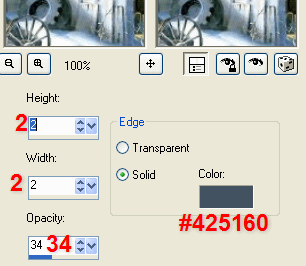
17..::EFFECTS DROP SHADOW again –> Color #425160
and this time we use this settings
18..::MENU LAYERS–>MERGE VISIBLE.
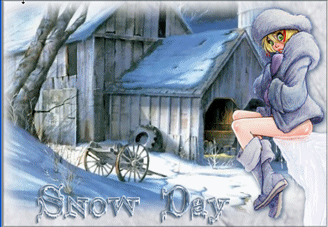
19..::MENU EFFECTS–>3D EFFECTS–>BUTTONIZE
This is what we have so far
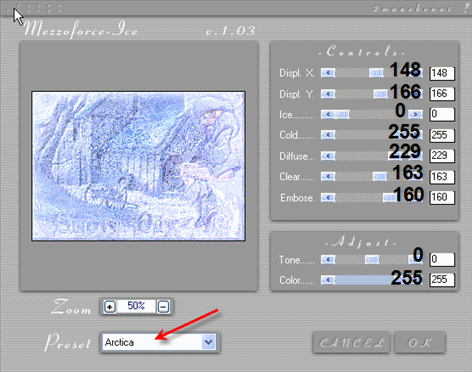
20..::In the layers palette DUPLICATE the merged tag
EFFECTS–>PLUGIN MEZZO FORCE-ICE –> Artica Preset
21..::In the layers palette set BLEND MODE to SOFT LIGTH

This is what we have now
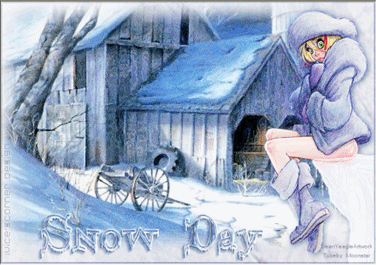
23..::LAYERS–>MERGE VISIBLE
Save as Animation Shop *psp file
Don’t close your tag yet.
24..::LAYERS–>ADD NEW RASTER LAYER
RENAME IT–>“Snow”
25..::And over this empty layer let’s apply
PLUGIN–>VDL ADRENALINE–>SNOWFLAKES
With this settings
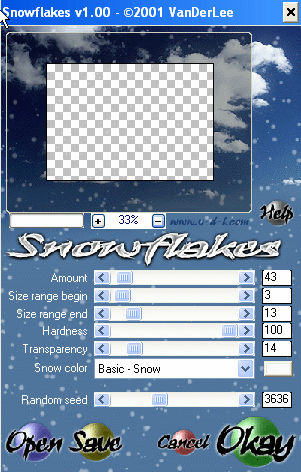
26..::Low the OPACITY of this layer to 60%
27..::LAYERS–>DUPLICATE LAYER “SNOW”
28..::MENU IMAGEN –>MIRROR (snow layer)
29..:: cLose visibility of the layer TAG
(we did save it previously..remember)
30..:: Save the snow layers without merging
as Animation shop *psp file
ANIMATION SHOP 3
1.:: OPEN “TAG file” we saved before
DUPLICATE (we must have 2 frames)
2.:: OPEN “snow layers” we saved before
EDIT–>SELECT ALL–>
EDIT–>COPY
3.::And paste them into the TAG
EDIT–>SELECT ALL
EDIT–>PASTE INTO SELECTED FRAMES
4.::ANIMATION –>FRAME PROPERTIES
FRAME 1 AT–> 22
FRAME 2 AT–>30.
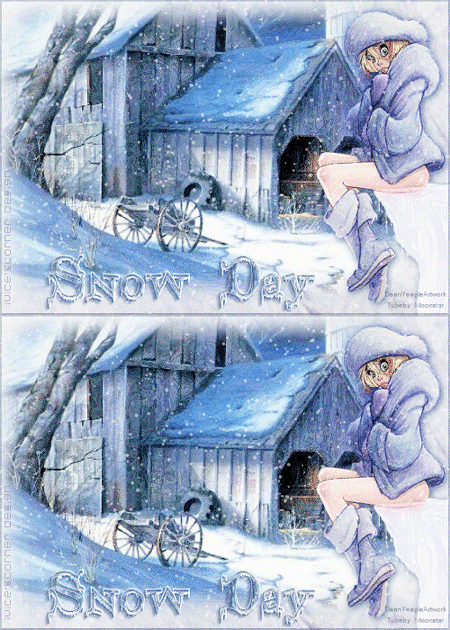
And we are done!!

If you would like to share your results with me,
You are more than welcome to post them in my
I would so love to see them 
loVE iS tHe WaY !
![]()

 English
 Spanish
 Dutch
Dutch
0 comments
No comments yet