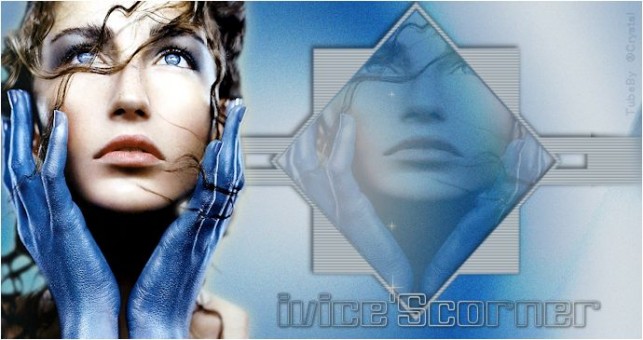

Tag Tutorial created by ®ivice2006
Last Updated: May 2017
Level: Advance
Tools: PSP9 and Animation Shop3.
Targeting: The use of Scrapbook accents.
All materials included *
Tested in PSPX and Corel PSPX7
* In the review of this tutorial I had add screen captures
taken with PSPX7 . Settings are not diferent
for other versions of PSP.
..:: TERMS OF USE :
The materials I use belong to the artist who created,
Please don’t change the name or use them for your own tutorials.
..:: MATERIALS ZIP
Donwload here♥
- Tube- ©crystal_M158-2
- Gradient – ivices_bluefeelings
- Shape Preset – shape23bf
- Font – White Wolf
Font White Wolf can be Download HERE
Install Gradient and Preset shape in your PSP folders.
..:: STEP 1
1..:: New image transparent 500×365 pixels
2..:: Set the color palette with this colors
FOREGROUND #1d4d85
BACKGROUND #bdc8ce
Change foreground to Gradient “ivices_bluefeelings”

**Important Note:
Use “Sunburst” style instead of linear
(as the capture is showing) and use this settings:
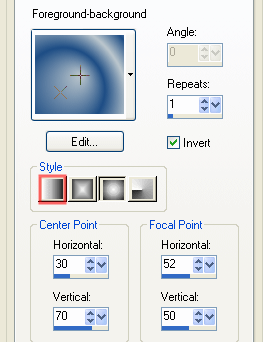
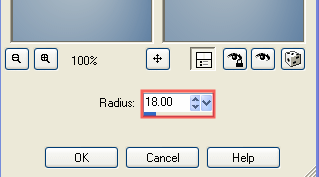
3..:: Flood fill image with it and
MENU ADJUST–>BLUR–>GAUSSIAN BLUR
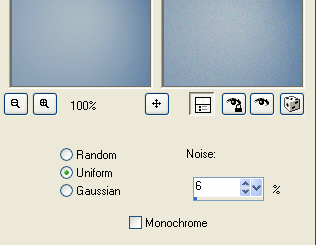
4..:: MENU ADJUST–>ADD/REMOVE NOISE–>ADD NOISE
5..:: Layer palette–> ADD NEW LAYER
6..:: Select PRESET SHAPE TOOL and pick ” shape23bf”
Let’s draw the shape using same colors as we have them:

7…:: This is what we have so far
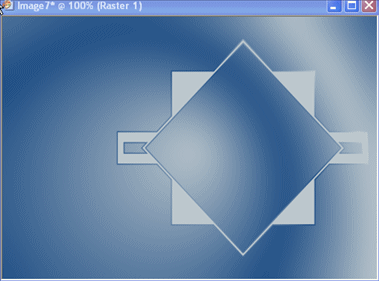
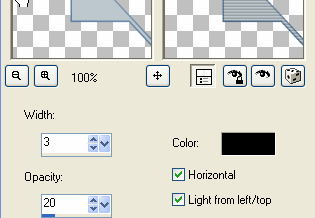
8…:: MENU EFFECTS–>TEXTURE EFFECTS–>BLINDS
9..:: Select MAGIC WAND with this settings
![]()
10..:: Click inside of the diamond shape
MENU SELECTIONS–>MODIFY–>EXPAND 1
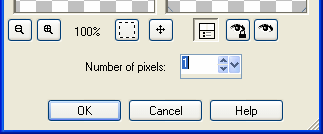
11…:: LAYER–>ADD A NEW LAYER
Copy and paste tube “crystal_M158-2”
INTO SELECTION
12…:: Setthe opacity of tube layer on 22%
this is what we have

13…:: SELECTIONS–>SELECT NONE
In the layers palette let’s drag “face layer”(caratube)
one level down to put it under the shape
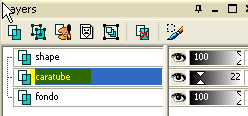
14…:: Lock the visibility of background layer (fondo)
and MERGE VISIBLE ” (shape and face-caratube layers)
This is how it looks our layer palette now:

15…:: EFFECTS –>DROP SHADOW
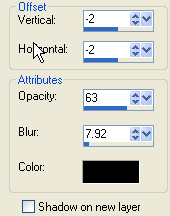
16…:: Copy and Paste AS NEW LAYER
face tube “crystal_M158-2” again
Resize at 75% and put into it’s place
17…:: EFFECTS–>DROP SHADOW color # e9e2bd
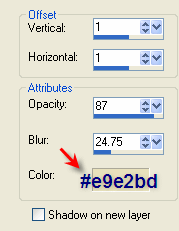
18…:: In the layers palette click layer background (fondo)
DUPLICATE
19…:: Apply illumination effect to this duplicated layer:
MENU EFFECTS–>ILUMINATIONS EFFECTS–>LIGHTS
using this settings: color# e9e2bd
* If you are experimenting with other Image sizes
Play with horizontak and vertical settings to adjust
the effect .
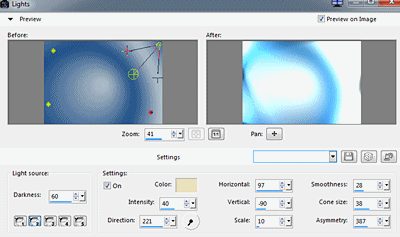
20…:: In the layers palette change the blend mode to SOFT LIGHT
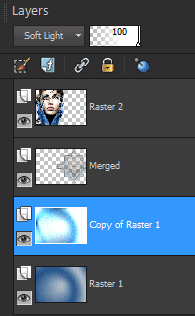
MERGE–> MERGED VISIBLE
21…::Add credits and signature I used this settings for the Font
![]()
22…:: EFFECTS–>DROP SHADOW

..:: STEP 2: Tears Effect
1…:: Active RULERS and GUIDES
MENU–> Check RULERS
MENU–> Check GUIDES
Drag a guide line it will be our reference path for the animated tear.
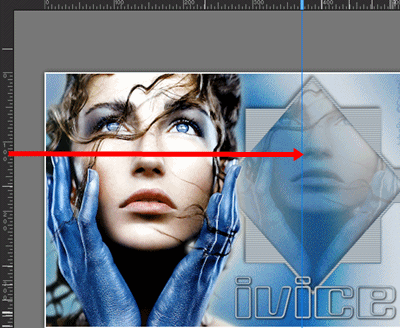
2…:: In the layers palette
DUPLICATE our tag layer until we have 11 layers
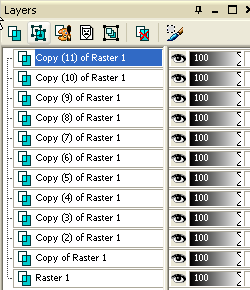
**TIP: We will be adding one sparkle per layer,
The method is basically the same for each sparkle layer:
We will be opening and closing the layers visibility
to be able to see and follow the path.
At the end we will delete the layers that we didn’t use,
and save the unmerged files into Animation shop.
3…:: Close the visibility of all the layers , except for the one at the bottom.
Click on it to activate it.
4…:: Set sparkle tube in white color, size 130
place the sparkkle on top of the letter of your choice
to mark where the tear will end up.
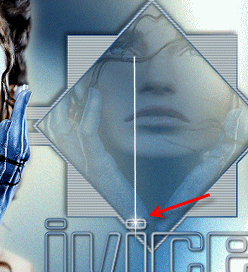
5…:: Change size of sparkle to size 45
Click on first layer on top to activate it
Copy(11)of Raster 1
Add the “Sparkle tear” at the corner of the eye
Now we have top and bottom layer defining the path.
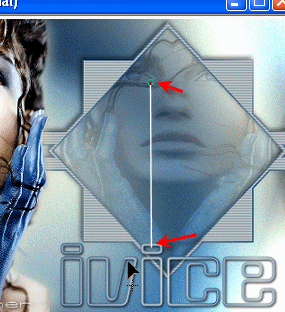
6…:: CLOSE THE VISIBILITY of this top layer.
(We will continue adding Sparkles
starting from the top layer to the bottom layers)
7…:: Click to activate second layer from top Copy(10) of raster1
and open it’s visibility.
Change sparkle tube SIZE 65 and apply
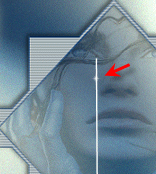
8…::Close the visibility of this Copy(10) of Raster 1
And click to select and open visibility of the next one down
Copy(9) of Raster 1
Apply sparkle tube SIZE 65
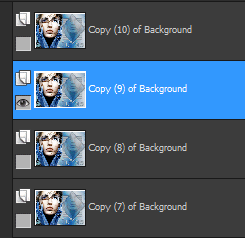
9…::Close the visibility of this Copy(9) of Raster 1
And click to select and open visibility of the next one down
Copy(8) of Raster 1
Apply sparkle tube SIZE 65
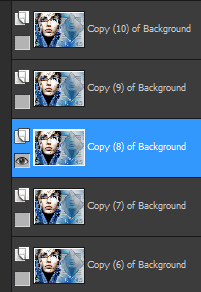
And so on until we have fill the whole path with sparkles to mark the tears.
** TIP: To have an idea in how your sparkles are lining up,
play by closing and opening the visibility if the layers.
To see how they will look once animated, close the visibility of all the layers
and open one by one ,starting from the bottom and up.
If you are happy with results:
10…::Delete the layers that were not used.
And save the non merged layers file as Animation Shop *psp
ANIMATION SHOP 3
1.:: OPEN file in Animation Shop:
2..:: MENU EDIT–>SELECT ALL FRAMES.
MENU ANIMATION–>REVERSE FRAMES
3.:: ANIMATION–>FRAME PROPERTIES 25
4.:: Click in the last frame and set FRAME PROPERTIES TO 75
And we are done!!

If you would like to share your results with me,
You are more than welcome to post them in my
FACEBOOK PAGE
I would so love to see them 
loVE iS tHe WaY !
![]()

 English
 Spanish
 Dutch
Dutch
0 comments
No comments yet