
Tag Tutorial created by ®ivice2005
Last Updated: May 2017
Level: Intermediate.
Tools: PSPX ,Reflet application and
Visman Natural Plugin
All materials included *
Tested in other versions of PSP including Corel PSPX7
..:: TERMS OF USE :
The materials I use belong to the artist who created,
Please don’t change the name or use them for your own tutorials.
..:: MATERIALS ZIP
Donwload here♥
- Tube- Love_Yourself_by_AsphyxiaRose
- PSP Style Line -Diamond
- Font Cincin
*Font Cincin can be -Download HERE
*Plugin Visman Natural (Starmaker) -Download HERE
*Reflet – Photo filter Download HERE
(This is not a program, you don’t need to install it.
Just download it , unzip in any folder of your preference
and double click the EXE file to open the application interface)
*Install “Style Line diamond” in your provided in your
Styled Line PSP folder.
..:: STEPS
1..:: Open tube- Love_Yourself_by_AsphyxiaRose
Duplicate and close the original
LAYERS->PROMOTE BACKGROUND
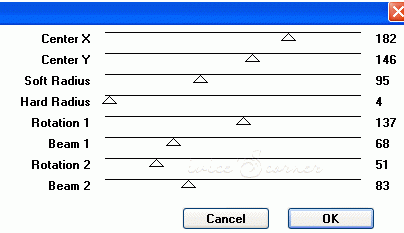
2..:: EFFECTS–>PLUGIN VISMAN NATURAL–>STARMAKER
With the following settings
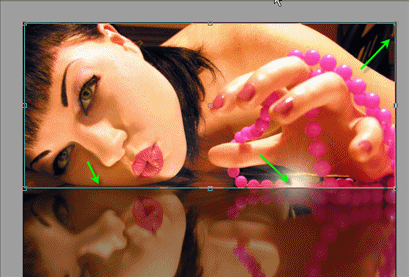
3..:: Select CROP TOOL
And let’s cut the image like I’m showing you in the sample
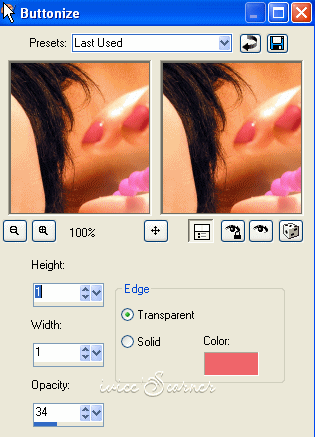
4..:: MENU EFFECTS–>3D EFFECTS–>BUTTONIZE
color #ef656a and this settings:
5..:: We are going to add a text
In my original Tag in 2005 I used COFFEE SHOP FONT
You can use it if you have it.
In this 2015 revision of my tutorial I am using
CINCIN FONT which is a free share font.
Select TEXT TOOL –>
Background #ef656a
Foreground #ffffff

And this settings:
![]()
6..:: Use at least one Capital letter to give the effect that one letter is bigger,
especially those with lower extension like p, g, etc e
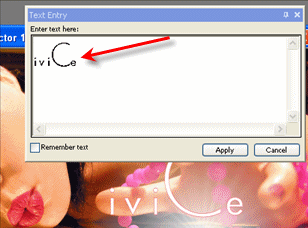
Manipulate the Vector until you have the capital letter
under her hand and be sure to put the text right in
lower border.
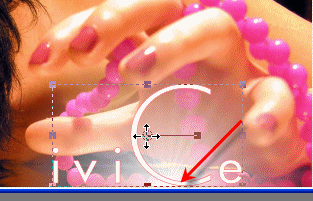
For those using CINCIN FONT make a vector text size 72
Select the letter C and change the Size to 120

7..:: LAYERS->CONVERT VECTOR TO RASTER LAYER
8..: MENU FFECTS–> 3D EFFECTS–> INNER BEVEL
Color ##ede7e7
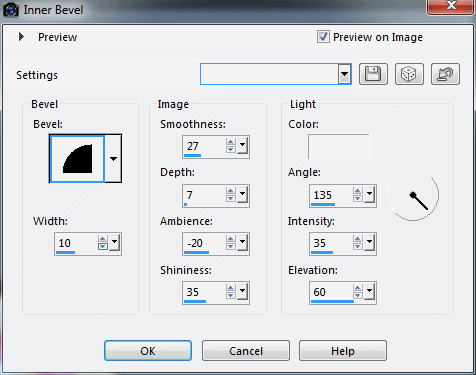
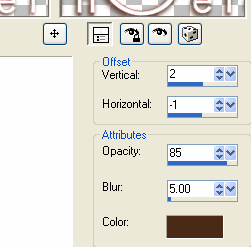
9..: MENU EFFECTS–> 3D EFFECTS –>ADD SHADOW
Color #6c4532
10..: Select PEN tool and Set colors to
Foreground #ede7e7
Using this settings
![]()
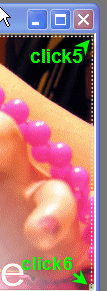
11..: Let’s draw a semi-rectangle around the tag like this
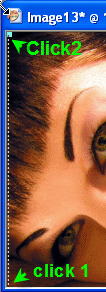

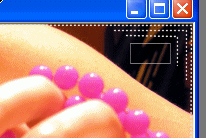
12..: Let’s draw more lines if we like.
We can also use shapes if we want …like my example
(Change width to 0.5 and lock the background color
in the Color Palette to achieve the effect I have )
13..: MERGE ALL FLATTEN
This is what we have

14..: Save in JPG format and let’s open it in the REFLET utility
This is not a program you don’t need to install it.
Just unzip the files ad double click in this icon

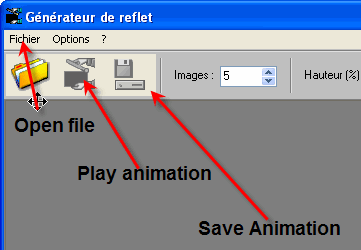
15..: This is what we get when we open it.
at the time I did this tutorial the program was released just
in french, by now you can download it in many languages.
16..: Open the tag we just made and set this settings in REFLET
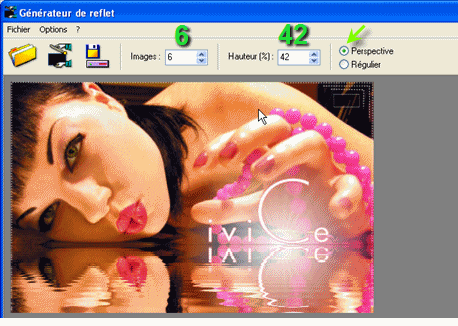
CLICK in the ANIMATION ICON to see how our tag looks
17..: And save in GIF FORMAT if we are happy with it
Use 256 colors regardless of the suggestion to use other resolutions
256 is still the best option.
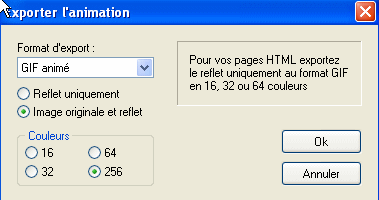
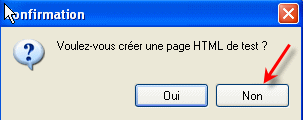
18..: It will ask you if you want to create an HTML page
Click NO . We don’t really need it.
And we are done!!!

If you would like to share your results with me,
You are more than welcome to post them in my
FACEBOOK PAGE
I would so love to see them 
loVE iS tHe WaY !
![]()

 English
 Spanish
 Dutch
Dutch
0 comments
No comments yet