Tag Tutorial created by ®ivice2005
Last Updated: May 2017
Level: Intermediate.
Tools: PSP9 and Animation Shop3.
Targeting: The use of picture frames
All materials included *
Tested in other versions of PSP incluiding , CorelPSPX7
..:: TERMS OF USE :
The materials I use belong to the artist who created,
Please don’t change the name or use them for your own tutorials.
..:: MATERIALS ZIP
Donwload here♥
- Tube redlouie_heelstube
- ivicescorner_brownstar_background
- Picture frame -Edge brush 04
- Picture Frame- Film
Save tubes in a folder of your choice.
Install Picture Frames in your PSP folder for them.
Download font Carpenter ICG from HERE
..:: STEP 1
Open tube “redlouie_heelstube” and
“ivicescorner_brownstar_background” in PSP
(Selections are running)
1..:: Copy “ivicescorner_brownstar_background”
PASTE INTO SELECTION as a background into
“redlouie_heelstube” Raster.
2..:: MENU SELECTIONS–>SELECT NONE
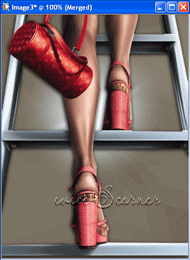
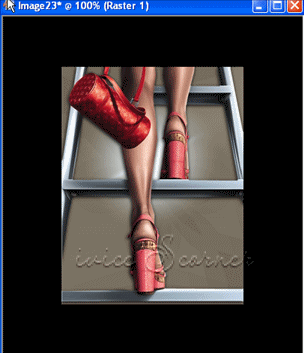
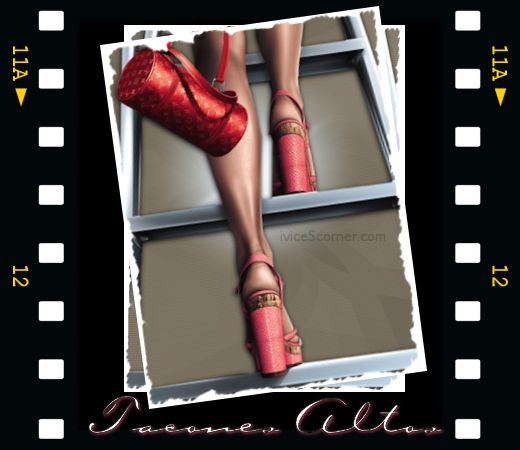
This is what we have:
3..:: Select “redlouie_heelstube” layer and add a shadow
With this settings:
4..:: LAYERS–.MERGE–>MERGE FLATTEN
SELECTIONS–> SELECT ALL
EDIT—> COPY LAYER
..:: STEP 2
1..:: Create NEW RASTER LAYER , COLOR BLACK, Size: 520×450 pixels
2..:: Paste the tube layer we just made before
EDIT–>PASTE AS A NEW LAYER
3.:: We are going to RESIZE the tube layer at 75%
(Be sure to uncheck RESIZE ALL LAYERS option)
This is what we have:
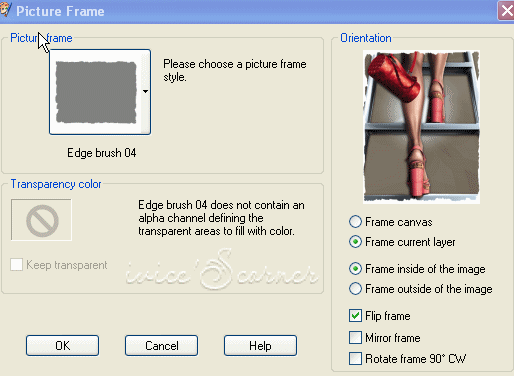
4..:: Click on the tube layer to select it and apply “Edge brush 04” picture frame
(included in the supplies zip for those using older options of PSP)
5.:: RIGHT CLICK on the top layer (that contains the frame)
and from the floating menu that appear ,select MERGE DOWN.
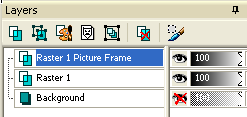
6..:: RIGTH CLICK on the merged tube-frame layer and
from the floating menu SELECT DUPLICATE LAYER.
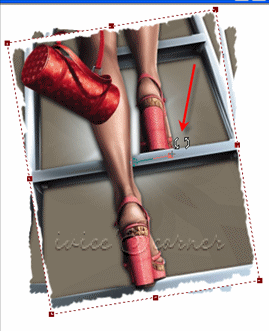
7..:: SELECT the duplicated layer and with the TRANSFORM TOOL
(PICK TOOL in older versions of PSP)
We will rotate one of the frames a bit to the left until we have
something like this:
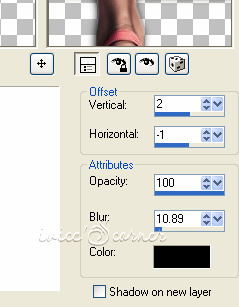
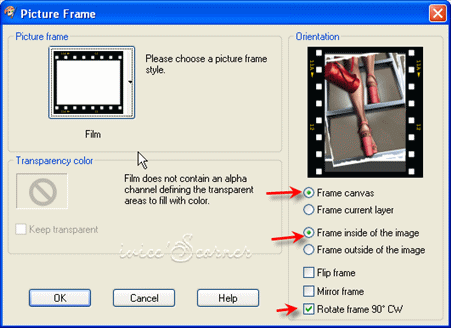
8..:: SELECT BLACK BACKGROUND LAYER and apply “Film picture frame”
with this settings:
9..:: Move, resize or position pictures frames as you like them to be
to also make space for our text.
I am using CARPENTER FONT
FOREGROUND : #000000
BACKGROUND: #FFFFFF
with this settings:
![]()
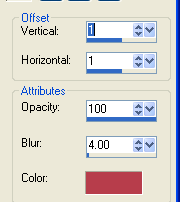
10..:: And a Shadow effect color #b73d4b, SIZE 65px
EFFECTS–>3D EFFECTS–>DROP SHADOW
Add a border is you want it.
11..::MERGE –>MERGE VISIBLE
12..:Save file as Animation shop *psp
Otherwise you could also use one of my favorites shortcuts
to export the file into ANIMATION SHOP:
* RIGHT WITH THE MOUSE CLICK on the merged image
* COPY FILE
*OPEN ANIMATION SHOP
*RIGHT CLICK WITH MOUSE over interface
*PASTE IMAGE 😉 and there you have it!
ANIMATION SHOP 3
1.:: OPEN file in Animation Shop
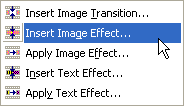
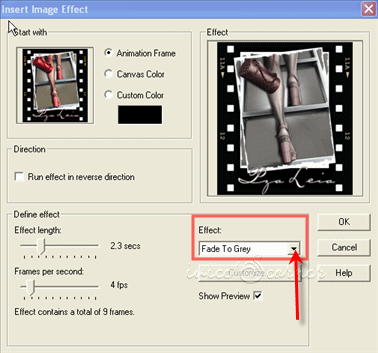
2..:: MENU EFFECTS–>INSERT IMAGEN EFFECT-
3.:: SELECT FADE TO GREY EFFECT with this settings:
4..:: SAVE AS A GIF
If you would like to share your results with me,
You are more than welcome to post them in my
I would so love to see them 
loVE iS tHe WaY !
![]()
 English
 Spanish
 Dutch
Dutch
0 comments
No comments yet